Showing posts with label thread. Show all posts

Wednesday, February 23, 2011

20 DTG-The Real Thing, Continued

After running into the problems with the lining last night, I played around on some scrap lining.  I increased the stitch length to 10-8 (from 10-12), but still had run lines.  Then I used tissue paper as backing behind the layers to provide stabilizer that I could rip away after the seams are sewn.  While this somewhat worked, it's a pain to have to tear the paper away and keep my stitching even.  If a different type of thread or needle would fix this problem, that'd be much easier.  So I went out in search of the Martex needles (size 70/9) and silk thread to give me some options to try.


With the new needle things went MUCH better!  The fabric still puckered a bit on curves, but that came out with the iron.  And I was looking to at least eliminate the snags and runs.


So on with sewing together all the lining pieces!  I didn't use the silk thread, so I'll be able to return that.  I wasn't wild about it anyway, because in the speciality threads there's not as much color selection.  There was only one light purple choice and it was waaaaay gray looking and not a match.  At all.


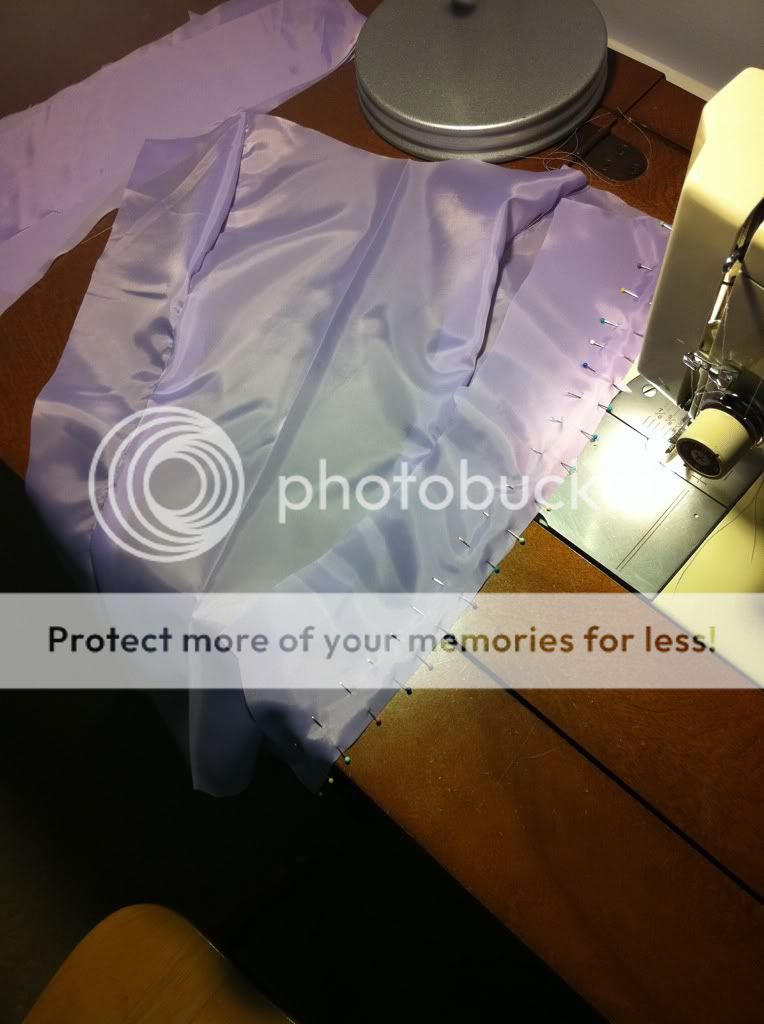
Outer layer and lining layer all sewn together
Seams aren't pressed yet


Now to combat the next problem, which I knew was coming from past experience with specialty fabrics, but out of lack of time, I've never done anything about it before.  Fraying.


Some fraying is already beginning to occur and will only get
worse as I iron down the seam allowances and this layer is worked
on to embroider it


The Vogue pattern called for the seam allowances of the outer layer to be pressed and top stitched, just like I did with the lining layer.  But I did that on the lining layer to create channels to run the boning through.  I didn't do this on the outer layer of the mock up to save time.  Remember, the mock up is all about a proper fit off the pattern pieces, not a complete garment.


Top stitching the outer layer can be about a few things.  First off, it's a "look."  Just part of the design so to speak.  The same way you might choose pleats or add a strip of lace for embellishment for a top.  And in the case of this garment, which is simulating the look of a true corset, the top stitching lends to that "look."  Since I'm embroidering the top, I chose not to top stitch for look.


Top stitching on jeans-as much for a "look" as for reinforcement of the seam


But it can also be about reinforcement.  Lending support to those seams by having another layer of stitching along them.  Or reinforcement from fraying.  If a fabric is prone to unravel easily, you hem it to protect the raw edge from wear and friction which leads to the fraying occurring.  Or you can put another layer of stitching between the raw edge and the seam.  Top stitching would qualify for this, but I've seen a highly fray-able fabric fray right between a seams stitches and go right on to unravel AT the seam on a pressure point.  Bras tend to do this in the back band, for example.  And I don't need to sew the seam allowance to the outside layer (where that extra line of stitching would show) for reinforcement purposes.  I could just sew an extra line of seam in the allowance about 1/4" away from the actual seam.


This is one of the many reasons for a serger or overlock (a type of sewing machine that makes a special bound edge and cuts the fabric as it goes all at the same time). 


Example of some overlocked edges done by a serger


While my machine isn't a serger, it has some of the zig-zag stitch and encasement stitch capabilities that would create a similar effect to serging as far as preventing fraying.


I played with some of my machine's stitch capabilities on a scrap piece of lining
fabric to see what would work best for the effect I wanted.


Zig-zag stitching the seam allowances of the taffeta layer with underlining


Here's what I did to each seam allowance to prevent fraying


Finished seams-that's a lot of loose threads to keep track of!


Once I was done with the taffeta layer, I did some loose thread maintenance.  I went through and removed (i.e. ripped out) all the vertical baste threads that were holding the underlining layer to the taffeta because the seams are now doing that.  This is where having done the basting in black would have been beneficial to keep track of what I needed to pull out.  Oh well.  Then I tied off all my seam and zig zag ends.  So now, the only loose threads left are the baste stitching along the tops and bottoms of the pieces.

To Do List
  • Stitch down seam allowances on lining
  • Stitch layers together
  • Send off to mom

21 DTG-The Real Thing, Continued

Started out today by stitching all the taffeta underlined pieces together, using Light Violet thread on both the top and bobbin.


Middle front pieces joined to center front
Notice all the thread ends that I need to keep track of
so I can remove the appropriate basting strands


Then I concentrated on piece 8.  Remember, this is the back band that the grommets will be punched through.  To reinforce these pieces, they aren't underlined like the other taffeta pieces of the garment.  These are the pieces that were cut from fusible interfacing, which has a heat/water activated glue built into it which secure it to the underside of the taffeta.  The "glue" side looks metallic, so I have to be sure and face this to the taffeta.  I learned the hard way about 10 years ago, that this stuff is NASTY when it sticks to the plate of my iron.


To join the pieces together, the instructions recommend placing a damp cloth over it and placing a high heat iron on top of them for 10 seconds.  I'm sure this is meant to leach the water from the cloth into the interfacing, but I have a very nice, very powerful steam iron, which works just as efficiently.  I just need to be sure and leave it on each second for long enough for fusion to occur.  Trial and error indicated 15 seconds and about 3 puffs of steam do the trick.


Pieces 8 with interfacing fused to them


I folded the pieces lengthwise and stitched across the upper and lower edges
Then I trimmed the seam allowances down to about 1/4", inverted the pieces so the right sides showed (using the technique with the skewer to turn out the corners as discussed when I made the mock up), and pressed the folded edge.


Then I based the raw edges together.  Again, I should have
used a contrasting thread color to not waste my Lavender Bliss
and to make the threads that I need to later remove, stand out


I pinned the piece 8 to the back edge, matching up
the alignment dots that had been transferred from the pattern,
then stitched the pieces down
(Lavender Bliss on top, Light Violet on bobbin)


I started to stitch the lining pieces together (using Light Violet on both the top and bobbin) when I ran into a HUGE problem.  Remember when I did Ashley's Alterations and I ended up hand stitching everything because the charmeuse was snagging when I used the machine?  Well, I ran into the same problem again with the very thin material of the lining.  It puckered horribly and started pulling runs across the fabric.


This usually indicates a dull needle or one that isn't fine enough for the type of fabric.  But I am using a brand new, size 11 needle.  Internet research gave me a few suggestions to try, but it'll required a trip to Hancock's tomorrow before I can move on.

  • an even thinner, Martex type, needle in size 70/9
  • specific thread made for silk fabrics (because it's finer)
  • increase the stitch size
  • use tissue paper as either backing or between the layers to provide a type of stabilizer that I would rip away after the seams are sewn


To Do List
  • Buy finer needles and silk thread
  • Test out some of the suggested techniques to find something that works for the lining
  • Stitch all lining layer pieces together
  • Stitch down seam allowances on lining
  • Bind seam allowances of taffeta layer
  • Stitch layers together
  • Send off to mom

22 DTG-Petticoat & The Real Thing

My petticoat came in yesterday, but I didn't have a chance to try it on!


It came all petite-ly packaged, encouraging for transport


I carefully took note of how it was folded up, but it came with a step-by-step instruction sheet detailing how to get it back in its collapsed condition.


I LOVE how full it is, especially that the tulle layers hide the
"hoop look" giving extra fullness


Starting Construction


Although the Vogue pattern that I am using for the corset top doesn't call for underlining, the construction of the McCall's top that originally came with the dress, did call for one.  So taking the best practices from each top (since I merged some of both patterns, mostly relying on the Vogue pieces), I had cut two sets of lining for a lining and underlining.


I purchased 2 different colors of thread, based on best coloring matching of the various materials (taffeta, organdy, and lining).  And how I sew through the various steps can be determined by which threads I'm using in which positions (the top spool and the bobbin from underneath the machine).


  • Coats and Clark Dual Duty XP 250 yds All Purpose 3620-Lavender Bliss (color matches taffeta)
  • Coats and Clark Dual Duty XP 250 yds All Purpose 3340-Light Violet (color matches lining)

I baste together a piece of underlining on the "wrong" side of each piece of taffeta.  Basting stitches are longer because they are made to temporarily hold together 2 pieces until permanent seams are put in and are usually ripped out later.  I use 6 for basting (the longest setting on my machine) versus 10-12 for regular seams.

I kinda messed up because I forgot about the color switch trick for basting.  Instead of "wasting" some of the good, color matched threads for basting (because they're just going to get ripped out and thrown away later), I like to use black or white bulk thread.  The bulk thread is cheaper and is usually generic quality.  And by using a contrasting color to those that match the fabrics, it's easy to see what I need to make sure and later remove.

Instead, to baste, I used Lavender Bliss on the top and Light Violet on the bobbin, matching each thread to it's appropriate material side.

Underlining (seen on the turned up piece) basted to taffeta pieces 

The pattern calls for certain places of the pieces to be reinforced by "staystitching" on the edges.  Staystitching is a line of straight stitches, smaller than basting, usually about the same stitch length as what you use for seams.  Smaller stitch lengths are harder to unravel if something should pop and harder to pop if the seams strain.  In other words, smaller stitches equal a stronger garment.  Staystitching, occurs about an 1/8" from the seam (which is at 5/8" so I staystitch at 1/2"), and is used on seams that curve (such as at the bust) because this is where more strain will be placed on the garment.  On my garment, staystiching is called from between the 2 match up arrows on the sides of the front center piece (right where the bust will curve outward to accommodate Da Girls) and along the curve of the sweetheart neckline.

Staystitching between the 2 match up arrows on
sides of front center piece

To Do List
  • Stitch all pieces together
  • Stitch all lining layer pieces together
  • Stitch down seam allowances on lining
  • Stitch layers together
  • Send off to mom