Friday, January 13, 2012

2012


Resolutions.  Being the A type I am, I always feel the need to put a few of these on myself, mostly as goal to motivate toward.  But some years, the opportunity comes and goes because I pressure myself to have a list completed BY New Years Day.  Not so this year.  Christmas was an especially hard season for me this past year; I constantly felt like I was behind and drowning.  And our season lasted well into 2012 with my brother and his fiancée here for a second round of holiday for us.  So employing my ever-expanding flexibility, with some down time with our first REAL, sticking-to-the-ground snow falling outside, and a renewed sense of motivation, here’s my 2012 list:

  • Refine Our Financial Picture — Better budgeting.  Continuing to simplify the methods I use to track our finances and enlisting more of my husband’s help in understanding and controlling our money.  Along these lines are a more concrete plan at taking a crack at owner building a home on property.  Which also means cementing (I kinda like that little pun) our plans, bids and budget for the build.
  • Complete the Paperless Project — Speaking of simplify and tied in to all that budgeting, financial projecting and planning a home build…I made HUGE strides on this in 2011.  I changed our ENTIRE study last year – filing cabinets, mismatched bookshelves, a bowing corner desk with abysmal storage, an aging, unused desktop computer, and boxes of miscellaneous supplies, papers and unknowns are gone.  We installed an Ikea Billy bookcase system and kitchen cabinet uppers over a desk system.  I scanned drawers full of paperwork to the computer, created a back up system and shred bags-worth of papers.  And there’s room for more improvement.  I still have a section of old taxes and receipts, warranties and instruction manuals I couldn’t find online, and home planning ideas that I want to get into the computer to purge the original hard copies and create even more open space in our home.
  • Live More Simply — This mantra is what manifested the entire Paperless Project to begin with.  It's looking around my home more closely at what we own, do we use it or need it, purging what we don’t, closely monitoring what comes into our home, and regulating the way things are organized to best utilize what we do need.  I regularly go through each room and closet, honing in on that space’s purpose and modifying how to make it perform that as easily as possible.  But I have a disconnect between pulling out what we’re purging and actually moving it out of our lives.  Typically, things get stacked in the garage, a pile by my purse on the entry table, and an over heaped box of donations/reparables by the door.  But last year, I actually logged things for donation for tax purposes and got it to Goodwill, sold garments to Clothes Mentor, found recycling programs for electronics and listed several pieces on eBay and Craigslist.  My efforts made us some nice cash too!  I made the most progress in the study and our bedroom, and a respectable amount in R’s room and the craft/guest room.  So this year, I plan to do a complete house purge, top to bottom, touching on every piece of every little thing we own to determine if it stays and needs a home or goes.  And most importantly, following up on getting it ALL the way out of our lives.  Case in point: there’s already a pile of electronics in the garage from our study renovation last fall that needs selling or recycling.
  • Finish our bedroom — Completing our bedroom décor was on the 2010 list and we completed quite a bit in 2011.  In the 11 years we’ve been married, our bedroom has never been completed to the Nth degree as my dream bedroom.  Obviously, there will be lacking parameters that we can’t reasonably accomplish in this house’s structure (such as a fireplace, balcony, and a larger his/hers walk-in-closet), but I want to complete this bedroom to the point where it is the room I go to and not have to see anything I need to do.  Now I realize this means moving projects out of the bedroom solely so they’re not in there, which is only deferring them to other spaces, but that’s part of the goal of a “worry free” area in my home.  And what better place for that than the place we sleep and end and begin our days?  I’d like to get to the point that ongoing projects are only occupying the study and my craft area, but that’s not going to happen this year.  And taking this step to see our bedroom finished would also instill the notion that I can follow something thru to ultimate completion.
  •  Read 50 books — Well, I didn’t get it done in 2011 as listed.  Check out my Goodreads for my 2011 list of 42 books.  But I am delighted with the reading strides I DID make last year in trying to reach 50 books.  I just read more.  Comparatively, I only read 34 books in 2010, so that’s 8 more books.  But my magazine to-read pile also no longer occupies entire shelves of space in my study (I recycled them after making up 3 YEARS of backreading!).  I read a TON (of pages, of books, of hours) to my daughter, and I know this has cemented her voraciousness for reading because 3, 4, 5, 6 books are no longer enough.  If I kept reading, she’d just keep asking until we cycled back around to the first book again.  I re-incorporated reading as a natural, daily habit in my life.  I always have a book in progress on my iPhone (for whenever I’m a passenger in a car or plane) and a physical selection on my night stand (I read nightly to turn off my brain until my eyes close).  I was excited about gobbling up pages and finding new authors and new series.  I learned things about what I like in books, which will make me a better, more purposeful author.  I learned there are things I don’t like to read which developed my junk sensor.  Which leads me to...
  • Write more, blog more, read less ­— That’s right, I said it.  Read LESS.  Now how on earth do I propose that, when I once again listed an attempt to reach 50 books in a year (which we know I did not accomplish this year)?  The fact is I waste a lot, and I do mean a LOT, of time reading useless crap on the internet.  “News” articles, Facebook and Twitter statuses, other blogs, endless research for writing and blogging and crafting.  And it’s just that…endless.  I could read every piece of advice, every successful example on earth and it just keeps me from ever getting my own done.  I must trust in my ability to do this.  I will either develop a presence or I won’t.  But I definitely never will if I don’t ever develop anything of my own for someone else to read.  It’s faith.  It’s confidence.  And it’s time I stopped being afraid of people’s reactions to what I have to write and jumped off that cliff.
  • Be Purposeful — It boils down to economy of time.  As a stay-at-home mom I fritter away lots of moments leading a fairly free flow life.  Certain things are set in stone, but the rest is do as I please according to my family’s needs.  I’m a consummate list-maker, but not a good scheduler.  I shy away from routine to keep from feeling obligated, locked in and restricted artistically.  But a little more structure would do our family well when it comes to chores and things affecting our health.
  • Improve My Health — Again, I did well with improving this area in 2011, but I want to build upon that.  In July and August, I completed 46 days of the 30 day shred.  While I didn’t lose all the weight I wanted to (or keep it off for a significant amount of time), it did improve my overall endurance and was making a difference in the way my clothes fit.  I walked more and longer this past summer and fall than I did the previous year.  I’m more consistent with my skin care regiment since installing my vanity table area and teaching my daughter to moisturize.  I’ve cut out alcohol and soda except in social situations and we cooked for ourselves more (largely sticking to eating out only 1-2 times a week, mostly Friday night dinners and Sunday afternoons).  This year the focus is on health screenings and routine check ups (which I’ve let lapse since not having insurance), building toward a fitness goal (as yet undecided), assessing my dental situation, expanding our gardening, restricting my sleep, and habituating time spent outdoors year round.
So there’s the list.  8 big ideas, encompassing lots of smaller parts, while giving me some freedom and wiggle room.  Last year’s list was clearly more concise and specific, which might have led to half of it’s demise.  Here it is just for giggles:
  • Read 50 books — Suggestions included the Black Dagger Brotherhood series; Maggie Stiefvater’s finale to the Wolves of Mercy Falls trilogy and her stand alone, Scorpio Races, and her first series (Lament and Ballad); Aprilynne Pike’s Wings series; rereading Christopher Pike’s Last Vampire Series and the newly released continuances of that story, now called Thirst; Libba Bray’s Gemma Doyle trilogy; the rest of Elizabeth Chandler’s books that I haven’t read; Mortal Instruments series; Iron Fey series; The Red Tent; and Meredith Ann Piece’s Darkangel Trilogy.  See my Goodreads for my accomplishments.
  • Break ground on the house — Not accomplished.  Not even close.
  • Start the adoption process — We did this by attending an orientation, through our church, outlining the steps to foster care and fostering to adopt through the State.  That’s as far as we got.  Because we want to build a home in order to have plenty of space for our expanding family (and ensure that we have more than enough in case we’re called to add a sibling pair to our family).  If we complete the home prior to the adoption finalizing, that structure would have to be ‘recertified’ as opposed to the house we’re in currently, which muddles up everything.  We’d just prefer to be settled in a place where we know we have the space an additional child (or children) would need.  So house first, adoption 2nd.
  •  Lose 20 pounds — Yes.  And then no.  Which prompted me to rethink how I stated this goal for 2012.  Overall health is a much more important factor than a specific number.
  •  Meet the girls at NashCon — Completed in March 2011
  • Get to the East Coast — A vacation goal for the last few years, since moving to Kentucky and being that much closer to it.  Vacation goals have been difficult our entire marriage because we tend to defer the money into improving our home instead.  Our calendar in 2011 resulted in a lot of little trips and visits all year long.  There was something on the calendar every 3 weeks or so, and things kept popping up last minute, like a friend’s wedding, my husband’s job sending him to Chicago several times for training, and my brother’s leave in Washington DC prior to his deployment to the Middle East.  It didn’t leave much time for one big shebang, much less to pre plan.  I’m trying to purposely keep the calendar much sparser this year, knowing that it’ll get filled up all on it’s own.
  •  Finish my book — Again, too specific.  I made large strides in writing in several areas, including working on my book quite a bit.  But solely focusing on the book, wouldn’t have left time or flexibility for any of my other projects, which are important to me too.  And I feel that habituating sitting down to write is going to serve me better in the long-run than if I had forced myself to crank out the rest of my novel.


Saturday, February 26, 2011

14 DTG-The Skirt, Taffeta

Now that I know that the lining layer is as full as I was envisioning and works with the petticoat, it's onto the taffeta layer.  It's essentially constructed the same way the lining layer was, from the same pattern pieces.


Under Layer (Outer Layer of the Stay) - Taffeta
  • 10 - Waistband (only 1 cut from material, cut second one from interfacing)
  • 11 - Side stay (cut twice to equal 4 total pieces)
  • 12 - Front stay
  • 13 - Back stay
I've laid out, but not cut, pieces 12 and 13.  I'll start with them first, so that all I'll have left are 2 sets of piece 11 which I'll need to refold the remaining material in the other direction.


Piece 13 cut out of taffeta. You can see the extrapolation
to add length to the bottom compared to the pattern.


Transferring markings from the pattern to the material


I use a pin through the layers to transfer markings to the bottom layer of fabric


Piece 12, Notice my ironing board in the foreground,
the bolt of remaining fabric across the arms of the chair
in the background and the taped instruction sheets to
the bookshelf for easy reference.


Second set of piece 11.  There's a lot of extra yardage draping off the table on the left.


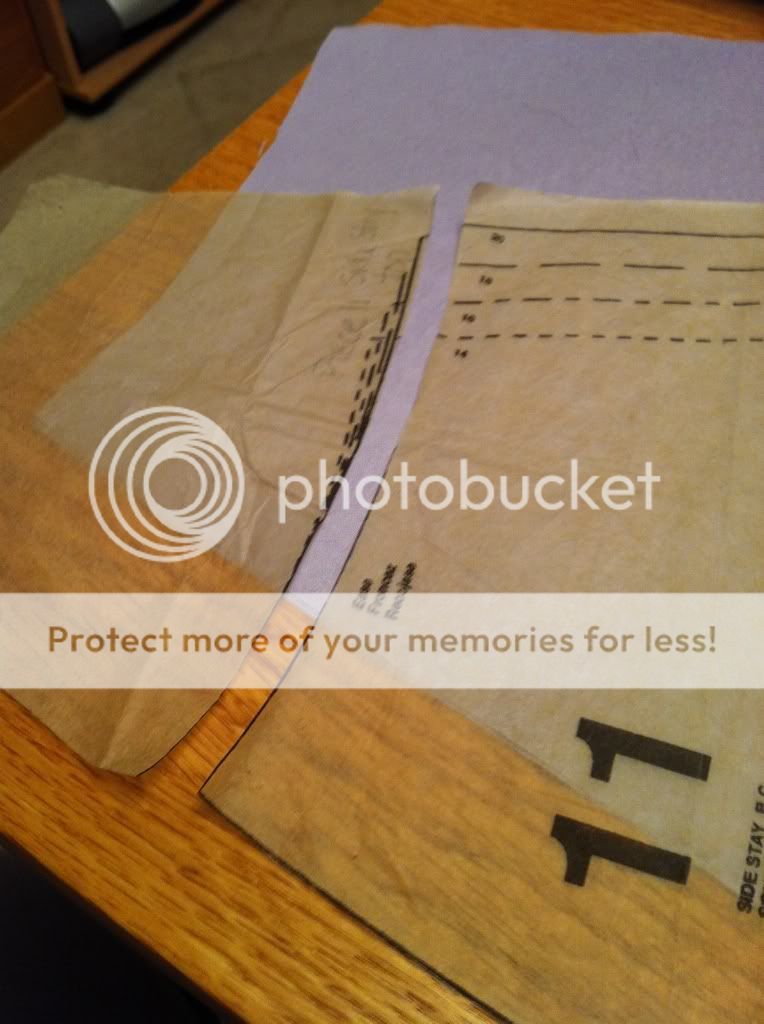
Once I'm done with these pattern pieces, I'm finished with them, so I can put them away.  There was a section of piece 11 for the other sizes that had been cut off when cutting out material.  I had labeled it in case it got lost floating around, but I reattach it now.


I like to fold my garment pieces together, so they come out as a complete packet if I ever need to use them again.  Then they go back into the pattern envelope.  I'll have to blog sometime on my organization methods, probably when I detail my dream craft room and what I have now.


The last piece I need is a single cut of piece 10 for the skirt waistband, which I take from a left over margin.


Then it's onto assembly!  I'm finally feeling more excited about the outcome of this project than I am stressed about the lack of time to finish it.  I think, since being at the TWO WEEK TO GO mark, the excitement about the trip in general is starting to kick in.  :-)


Just like cutting out the pieces for the taffeta were nearly identical to cutting them for the lining, so is assembly of this layer.

  • Stitch together front half:  11 - 12 - 11
  • Stitch together back center sections 13 - 13 up to large circle, leaving above this mark open.  This will be where the zipper runs.  Clip seam allowance to large circle.
  • Stitch remainder of back half:  11 - 13 - 13 - 11
  • Stitch front and back halves together to create circle.


To Do List
  • Seam allowances of lining and taffeta
  • Figure pockets
  • Join lining and taffeta
    • zipper
    • waistband
    • hem (horse hair)
  • Cut pieces from organdy
  • Assemble organdy layer
  • Finish skirt details

Friday, February 25, 2011

15 DTG-The Skirt, Lining

Let's review what pieces I'm working with for the skirt lining:


Lining Layer (Under Layer of the Stay) - Lining

  • 11 - Side stay (cut twice to equal 4 total pieces)
  • 12 - Front stay
  • 13 - Back stay

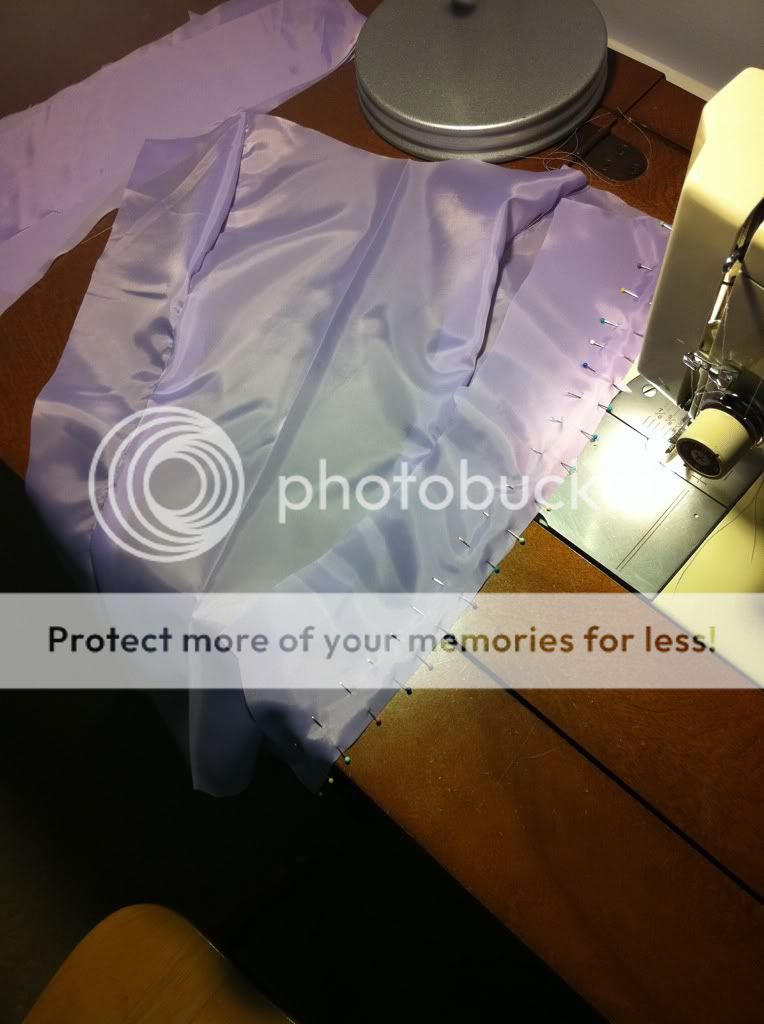
First, I stitch together pieces 11 - 12 - 11 to make the front half of the skirt.

Front half:  11 - 12 - 11


To make the back half, I stitch the 2 piece 13s up to the large circle.  The gap in the remainder of this seam is where the zipper will go later.


Next is joining the other set of piece 11s to the outsides of the joined pieces 13. 


I end up with 11 - 13 - 13 - 11


Now, I join the back to the front, essentially joining both piece 11s to the other set of piece 11s.  In the end I'll end up with a circle of:


11 - 12 - 11
/                \
11                11
\               /
13  -  13


I try this on for fit at the waist and over my petticoat to see if the angles of the skirt are full enough.

Assembled lining with my petticoat on

And I fall in love with my dress all over again!!  I'm so excited that it works and is coming together!

To Do List

  • Cut out rest of taffeta pieces
  • Assemble taffeta pieces
  • Join lining and taffeta
    • zipper
    • waistband
    • hem (horse hair)
  • Cut pieces from organdy
  • Assemble organdy layer
  • Finish skirt details

Thursday, February 24, 2011

16 DTG-The Skirt

So after spending ALL DAY yesterday researching machines and visiting a dealer here in town, I've learned that even if I order a machine today, it won't come in for another 6 weeks.  :-(  So unless my mom can get this embroidered, I'm going plain.


In the meantime, I'm onto the skirt.


I had started cutting some of the pieces in order to cut out the top pieces.  I already have piece 12 and 13 cut out of the lining.  I need to cut 2 piece 11s (for a total of 4 pieces).


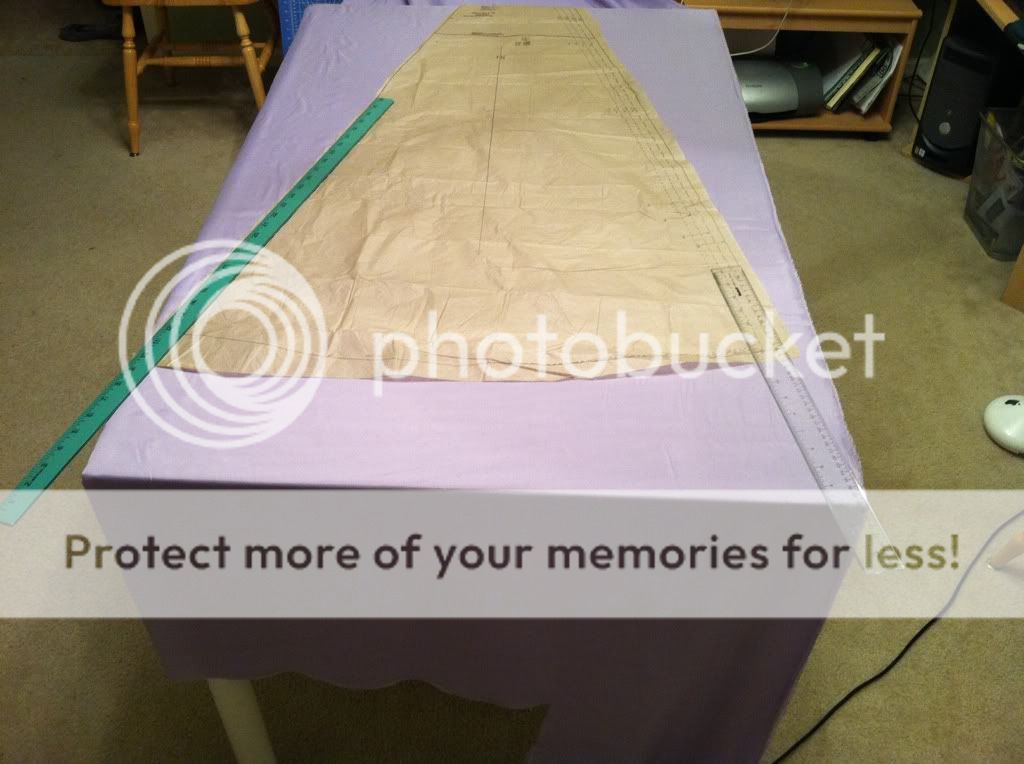
Piece 11 is a little tricky though.  This is the only piece that has different size markings on it (kind of like pieces 4 and 7 on the top).  To cut out the size that I need, I need the widest bottom on the piece.  Then to expand this by another foot (remember I need additional length for all the reasons I detailed in this post), makes the bottom even wider.


Once I extrapolate the base of the skirt by 12"
(which is marked by the rulers) piece 11 is too wide
to fit on the fabric this way


To solve this, the pattern directions recommend folding the selvages the other way.  Refolding a HUGE piece of fabric like this is a major PITA and has me wishing - again - that I had a better set up than my kitchen table, office chair and ironing board.  LOL


Here's how I normally spread out the fabric.
When it's folded lengthwise, it's just as wide as my table.


Here's the fabric folded in half the other way.
Notice the fold line down the middle left
from when the fabric is folded to roll on a bolt.


I cut 2 sets of piece 11 from the refolded fabric by
inverting the pieces to minimize how much material is used.


To extrapolate the ends of the skirt pieces, I use my quilting tools.


Tomorrow, to make sure the skirt is full enough (both for my tastes and to fit over the petticoat), I'm going to assemble the lining layer before I cut out any more material from taffeta or get started on the organdy.

To Do List
  • Assemble lining layer
  • Cut out rest of taffeta pieces
  • Assemble taffeta pieces
  • Join lining and taffeta
    • zipper
    • waistband
    • hem (horse hair)
  • Cut pieces from organdy
  • Assemble organdy layer
  • Finish skirt details

18 DTG-Rethinking Some Things

Well, the USPS is working against me.  I had the mock up and the semi-finished top ready to overnight off to mom today.  I packed the kid in the car and took my visiting cousin with us, only to find out:  It's a holiday!  So the post is closed.  :-(  BLAST!!!


What's in the box


So if this can't go in the mail until tomorrow, my mom wouldn't get it until Wednesday, leaving her less than 2 weeks for her to get the embroidery done and get it back to me to finish.  Due to unknown travel plans and a few technology things that need to still be worked out with her machine, it very likely will be even less time than that.  So, knowing our tax money is coming in, that I'd discussed with my husband using toward a machine of my own, I'm going to hold onto the top and investigate some dealers in town and see where I end up.  


Worst case scenario, I don't embroider the top.  I just do some hand beading, leaving it mostly plain.  In the meantime, I need to get to crackin' on the skirt!

19 DTG-The Real Thing, Continued

I started today with a little iron work.  I pressed all the seam allowances of the taffeta layer toward the way the directions instruct.  Then did the same with the lining layer.


Just like the seam allowances of the taffeta, those of the lining are likely to fray as well (and are already displaying signs of doing such).  But remember, I need to actually topstitch the lining's seam allowances down to form the channels for the boning to run through.  My thought is to attempt to do both things at once, by using the zig-zag stitch through the seam allowance and the lining.  Yes, that means those zig-zags will show on the lining, but I can live with that.  And I think it's kinda decorative.


But since zig-zag stitching is denser (meaning the needle pierces the fabric more often) than just a straight line of stitches, I want to offer the material all the support I can.  So in this instance, I'm going to put tissue paper in between the seam allowance and the lining and sew through all of it.


The white tissue paper on the left, comes under the seam allowance
I'm sewing through all 4 layers (2 layers of seam allowance,
1 tissue paper and 1 of the lining underneath)


To make sure I leave 3/8"  of space for the channel,
I played with the stitch length of the zig-zag
A length of 3 and running the material with the seam allowance
edge just under the left edge of the foot lined everything up perfectly.


It's kind of complicated, especially on the curves to keep the tissue paper appropriately placed and to make sure everything lays flat against the under layer, but by taking it slow and readjusting often, it comes out in a way that I'm happy with!  


The tissue paper tears away easily-the stitching acts to perforate the paper


I also folded under the outer edges by 5/8" and pressed them, then applied the same technique to zig-zag stitch these edges down, creating 2 more channels for boning.  All this zig-zag stitching has used up all my Light Violet thread, so I need to get more.


With right sides together, I pinned the taffeta and lining layers together across the top only.  In the mock up I did both the top and bottom, but remember that I need to leave access to embroider the taffeta layer.  By stitching the 2 layers together, this will give my mom a finished top edge to embroider under.  


2 layers stitched together.  This is the wrong side of the lining side.


Before I flip the 2 layers so the right sides are out, I reinforced the curve of the sweetheart neckline.  Remember, this is one of the lessons I learned when I made the mock up that I said I'd elaborate on later.  Well, now is time for later.  I reinforce it the same way I reinforced the edges of the front center piece - by stitching another line 1/8" into the seam allowance.  This line of stitches looks lighter below because I ran out of Light Violet thread and am using the Lavender Bliss (which is better matched to the taffeta than the lining, but once I fold this over, you won't be able to see it).


Reinforced sweetheart neckline


So the curve of the seam will lay flat when I flip the right sides out,
I make 1/2" clips on the seam allowance


I turned the fabric right sides out and pressed the top seam allowance

Tada!  Here's the semi-finished top

After it's embroidered, I'll add boning, finish the 3 edges, and insert grommets.

To Do List
  • Send off to mom!
  • Skirt
  • Beaded center embellishment
  • Finish top when I get it back from mom
  • Hand bead as time allows

Wednesday, February 23, 2011

20 DTG-The Real Thing, Continued

After running into the problems with the lining last night, I played around on some scrap lining.  I increased the stitch length to 10-8 (from 10-12), but still had run lines.  Then I used tissue paper as backing behind the layers to provide stabilizer that I could rip away after the seams are sewn.  While this somewhat worked, it's a pain to have to tear the paper away and keep my stitching even.  If a different type of thread or needle would fix this problem, that'd be much easier.  So I went out in search of the Martex needles (size 70/9) and silk thread to give me some options to try.


With the new needle things went MUCH better!  The fabric still puckered a bit on curves, but that came out with the iron.  And I was looking to at least eliminate the snags and runs.


So on with sewing together all the lining pieces!  I didn't use the silk thread, so I'll be able to return that.  I wasn't wild about it anyway, because in the speciality threads there's not as much color selection.  There was only one light purple choice and it was waaaaay gray looking and not a match.  At all.


Outer layer and lining layer all sewn together
Seams aren't pressed yet


Now to combat the next problem, which I knew was coming from past experience with specialty fabrics, but out of lack of time, I've never done anything about it before.  Fraying.


Some fraying is already beginning to occur and will only get
worse as I iron down the seam allowances and this layer is worked
on to embroider it


The Vogue pattern called for the seam allowances of the outer layer to be pressed and top stitched, just like I did with the lining layer.  But I did that on the lining layer to create channels to run the boning through.  I didn't do this on the outer layer of the mock up to save time.  Remember, the mock up is all about a proper fit off the pattern pieces, not a complete garment.


Top stitching the outer layer can be about a few things.  First off, it's a "look."  Just part of the design so to speak.  The same way you might choose pleats or add a strip of lace for embellishment for a top.  And in the case of this garment, which is simulating the look of a true corset, the top stitching lends to that "look."  Since I'm embroidering the top, I chose not to top stitch for look.


Top stitching on jeans-as much for a "look" as for reinforcement of the seam


But it can also be about reinforcement.  Lending support to those seams by having another layer of stitching along them.  Or reinforcement from fraying.  If a fabric is prone to unravel easily, you hem it to protect the raw edge from wear and friction which leads to the fraying occurring.  Or you can put another layer of stitching between the raw edge and the seam.  Top stitching would qualify for this, but I've seen a highly fray-able fabric fray right between a seams stitches and go right on to unravel AT the seam on a pressure point.  Bras tend to do this in the back band, for example.  And I don't need to sew the seam allowance to the outside layer (where that extra line of stitching would show) for reinforcement purposes.  I could just sew an extra line of seam in the allowance about 1/4" away from the actual seam.


This is one of the many reasons for a serger or overlock (a type of sewing machine that makes a special bound edge and cuts the fabric as it goes all at the same time). 


Example of some overlocked edges done by a serger


While my machine isn't a serger, it has some of the zig-zag stitch and encasement stitch capabilities that would create a similar effect to serging as far as preventing fraying.


I played with some of my machine's stitch capabilities on a scrap piece of lining
fabric to see what would work best for the effect I wanted.


Zig-zag stitching the seam allowances of the taffeta layer with underlining


Here's what I did to each seam allowance to prevent fraying


Finished seams-that's a lot of loose threads to keep track of!


Once I was done with the taffeta layer, I did some loose thread maintenance.  I went through and removed (i.e. ripped out) all the vertical baste threads that were holding the underlining layer to the taffeta because the seams are now doing that.  This is where having done the basting in black would have been beneficial to keep track of what I needed to pull out.  Oh well.  Then I tied off all my seam and zig zag ends.  So now, the only loose threads left are the baste stitching along the tops and bottoms of the pieces.

To Do List
  • Stitch down seam allowances on lining
  • Stitch layers together
  • Send off to mom